Posted on 2 Comments

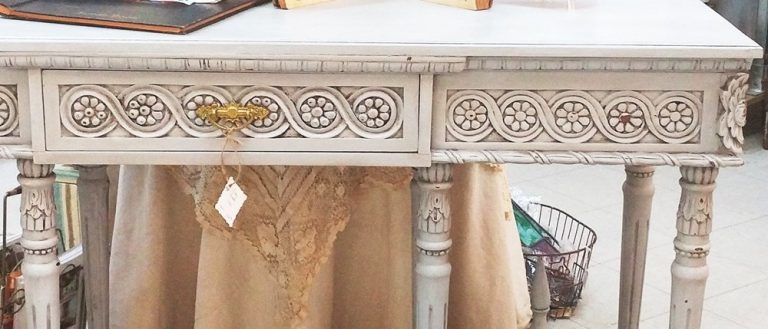
Hall Table Before and After – Or Is It A Sofa Table?

A few weeks ago, I found this table at a yard sale for $5.00.

It was missing a top and needed some serious glue in a few places. My husband, who really does not like working with old furniture, he prefers to build from scratch, made a top, glued all the places, sanded and spray painted it for me, God bless him!

He brought it to me and I spent nearly a day waxing. Here’s our finished result:

The picture isn’t that great. I should have taken one before we took it to the booth.

Before I show a close up of the color, distressing and waxing, I want to tell you – again – what an idiot I am.

I couldn’t wait to get it to the booth and rearrange. It looked fabulous! Really classed up the booth. People were stopping by looking at it while I was working. Then I made a seriously goob move. I priced it at $129.00. Whyyyyyy?????!!! I was competing with the booth across from me. She prices her things quite low. But honestly, I think, no I know, she would have priced something like this higher.

When I got home, I thought better of it – the too low price – and planned to go back first chance I got the next day. I also wanted to get a better picture and change the handle. I went back not 24 hours later and it was gone. Not only had it sold, it sold with a 10% discount! So someone got this beauty for $116.00. Sure, that’s not too bad for the $25 or so we eventually had in it, but it could easily, easily, have been more. And I’m not exactly doing this for my health, ya know? Oh, well. I’m proud we actually got it out without it sitting around here for months or even years. But guess what? It’s still in the mall. For double the price. (I think it’s one of the mall owners’ booths.) I think I’ll try to keep tabs on it and see how long they keep it.

I learned a couple of things with this experience. 1.) Don’t be afraid to price higher and 2.) I kinda liked the distressing process! Who knew?

Here’s what we did to achieve the results:

It was first painted with General Finishes Milk Paint. One part Lamp Black to 10 parts Snow White. I hit it with sandpaper in logical places, corners, edges, sticky-out parts and the like, then put a black wax on reallllly thick. I wanted the wax to chunk up in the details. You can click on the picture for a larger view.

About the wax. I used a homemade mixture. A clear paste wax with black pigment mixed in. My husband made that a few years ago. I really don’t know what he used but I do recall wax splatters in my kitchen. I’m pretty sure you can Google how to tint paste wax. Or just buy some Briwax on Amazon already tinted. (affiliate link)


$5 table re-do

Posted on 2 Comments

Lavender Custom Paint Mix For General Finishes Milk Paint

Lavender jewelry box

Lavender wasn’t in my color choices until recent years. I believe there was some kind of association with the color when I was a child. Maybe my mother didn’t like it. Maybe a kid who smelled wore it. Who knows? But it stuck. Now? I not only like it, I’m kinda loving it. It’s so calming and romantic.

As promised, I wanted to give the exact ratio of paint colors for the pretty lavender custom paint mix on this jewelry box.

Color mix ratio for lavender with General Finishes Milk Paint


I used General Finishes Milk Paint in Seagull Gray and Royal Purple.

~~~~~~~~~~~~~~~

8 parts Seagull Gray

1 part Royal Purple

~~~~~~~~~~~~~~~

You might have to play just a little. Different monitors will show the color slightly differently and, depending on how you measure it out, it probably won’t be exact anyway. With my first testing of colors, I used a teaspoon and a 1/8 teaspoon. Dipping a teaspoon in a can of paint is far from exact. You’ll have paint dripping off the bottom and not all comes out of the bowl of the spoon. So when I mixed the “for real” batch, using measuring cups, I kept having to add more purple. I still can’t figure out where I went wrong, but suspect I had my ratio wrong. Like the numbers didn’t convert in my head the way they were supposed to. That is logical considering my brain puts up a fight when numbers try to enter and it strongly resists manipulating the ones that do get in. Not to mention refusing to remember any of them. Anyway, the 8:1 is a fine place to start.

I’m enjoying experimenting with paint colors and hope to have more for you in the future — presented in a more professional way. 🙂

Posted on Leave a comment

And what did I buy at the first sale I’ve hit this year?

Painted Mason Jar

I’m still working through my dad’s stuff and my own accumulation of things and simply don’t need to go to any sales for awhile. Didn’t go to many last year. At all. And I’ll just say right up front, life almost isn’t worth living if you can’t get your junk fix! Shopping in my own storage units doesn’t do it for me. So hang it all! I’m going this year in spite of the boxes I still need to work through! Besides, the stash is actually dwindling to yard sale items.

So when a church sale was heavily advertised on Facebook, I made up my mind to be there when the doors opened. Yes, the gym was full of stuff. But I was disappointed. There was nothing there for me. Boo, hiss. This is all I bought:

Jars

A Classico pasta sauce jar and a little white bottle. I don’t remember what the white bottle was used for and have no idea what I’ll do with it, but the Classico mason jar was for another of these:

Painted Mason Jar

That painted mason jar was fun to do. This one is at the Pickle Patch in Sylacauga. If people will buy them, I’ll do a bunch, but if nobody wants them, I’ll chalk it up to another failed experiment in trying to sell things I’ve made.

On another note, we took this bookcase beauty to Angel’s in Opelika yesterday.

Bookcase using General Finish Milk Paint mix of Emerald, Patina and White

The shelves are painted with a custom mix of General Finish’s Milk Paint, Emerald, Patina and Snow White. Wish I could share the exact mixture, but Ricky mixed it up and didn’t make note of how much of what he used. We’ll probably never have the exact match again ourselves. I was annoyed that he didn’t make note of it all, then today, I was making my own combination of colors, thinking I was saying “equal parts this” and “twice that”, but when I was actually pouring up enough to paint with, the formula in my head wasn’t right. Not as easy to do as you’d think without carefully measuring and writing it all down!

Posted on 2 Comments

Pictures of the latest painted furniture pieces

Small table painted in General Finishes Basil

Most of my before pictures were lost. They were on my phone and when I dropped and broke the phone, they were lost forever. No back ups and no way to get into the phone’s memory, blah, blah, blah. So, we’ll  just have to use our imagination. Also, the pictures were taken in one of the booths. Not the best lighting. We have a great spot to take pictures of our furniture here, but can’t get to it! Some day……

First, this little table:

Small table painted in General Finishes Basil

This little table had certainly seen better days. Once upon a time, probably back in the 1930s or 40s, it was a nice, little, stained, lamp/side table. But at some point it was painted that ugly brown so often used way back when. It’s condition deteriorated and it was finally relegated to an outbuilding.

It belonged to a friend’s father-in-law and when we had his estate sale, we put a few bucks on the table. Apparently, no one could see past the terrible wobbliness and awful finish, so nobody bought it. Even when it was only a couple of bucks! So it came home with me. Hehe. Ricky put the glue to it and sturdied it up. He sanded the top, but I told him to leave the legs alone. He didn’t like the finish on them, but obligingly did as I asked. Hey, who likes to sand spindle legs anyway? But they had bubbled and alligatored nicely. You just can’t get that natural, aged look from a jar.

I painted the top with General Finish’s Basil green, lightly distressed it and went over the top with a dark wax. The poor lighting does not show how pretty the green is. It looks almost white, but trust me on this. It’s a very pretty color.

(Sold)


Next up, this mid century dresser. Again, another piece that wouldn’t sell at an estate sale. I had nothing to do with this sale, just a shopper. When it was over, the dresser hadn’t sold and the seller called me to see if we wanted it at a much lowered price. Sure! Here is the condition it was in:

dresser-before

Weird rust stain on the top that seemed to go through the depths of the piece. Lots of veneer missing. But good lines.

We didn’t change the color much, opting for General Finishes Milk Paint Linen.

Mid Century Modern Dresser in General Finishes Milk Paint Linen

There was a lesson learned here. If there is any inkling at all that a lot of wax might have been used, wipe down with mineral spirits prior to painting — no matter the type of paint you use! Even though this piece was sanded to within an inch of its life to get rid of that ugly stain on top, there was still wax in the grain. It made the finish less than pretty. A lot less. This one was Ricky’s project. Thank goodness! He took it down to the bare wood again, rubbed it down well with mineral spirits and started over. The result was perfection!

(Sold)


And last, this hutch, painted in General Finishes Milk Paint in Seagull Gray. Again, the lighting makes it look white. Seagull is a lovely, light gray.

Distressed, gray hutch painted in General Finishes Seagull Gray

There’s not much to say about this one except that it started off life as a dark stain, and rough to the touch, with no top coat of any kind. Ricky painted it lamp black for the base coat, painted Seagull over that, then distressed and waxed it.

(Sold)

Most of our furniture is finished with a wax, either a colored wax or clear. He mixes it himself with acrylic paint added to a clear wax. Sorry, I can’t help you out with that. I might put together a tutorial some day, but today’s not that day.